16: Creating the contact page
Next, in order for users to be able to contact me if they had questions, ran into any issues or simply wanted to make a comment was to make a contact form.
For this form, I wanted it to be in line with the existing aesthetic, look and colour palette of the site. However, I also wanted it to maintain a modern UI (user interface), wanted to keep it very simple, and I also wanted to make sure that the components were reusable for any other pages that would follow a similar format.
Designing the contact form
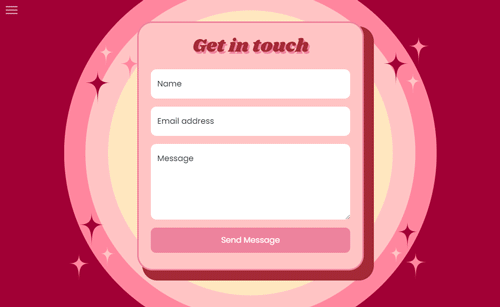
In Figma, I mocked up a few ideas of how this could be done and decided to create a look that was lightly inspired by a playing card, adding to the underlying appeal of a card also being used in games just like the magic 8 ball, but also to relate to the chance element in both.
I then created a few designs and decided on the below that I would implement in the form.

Once this was decided, I then created the form and created a centered position that was scrollable in case the user's device was small and would not all fit on the page. I also created the CSS through a reusable class that I could then use on other pages if needed, as below.
    .bgForm {
        min-width: 280px;
        width: 60vw;
        max-width: 450px;
        border-radius: 30px;
        height: max-content;
        border: 3px solid #ED839D;
        background-color: #FFC4C4;
        box-shadow: 20px 20px #A22A36,
                    10px 20px #A22A36,
                    20px 10px #A22A36;
        font-family: 'Poppins', sans-serif;
                                     }
I also wrapped this in a div and created another reusable class to make sure that the positioning on the page would be correct and applied to the child bgForm class.
    .bgFormWrapper {
        width: 100vw;
        position: absolute;
        display: flex;
        justify-content: center;
        z-index: 2;
        }
Once these were added, I then went onto creating the fields in the form.
Creating the fields
To keep the UI as simple as possible and to keep each of the shapes sharp and reduce clutter on the page, I decided the way I wanted to implement the fields was through the use of floating labels. The Bootstrap 5 includes floating labels, however I wanted to also customise them as well so that they would fit with the site.
As most of the shapes in this site had curved corners and large amounts of padding, I created the below fields that included the floating label aspect.
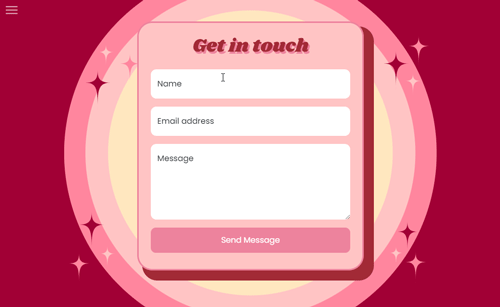
This solution allowed all the text to stay without the boundaries and to not distract the eye with any elements that weren't contained within its own border.
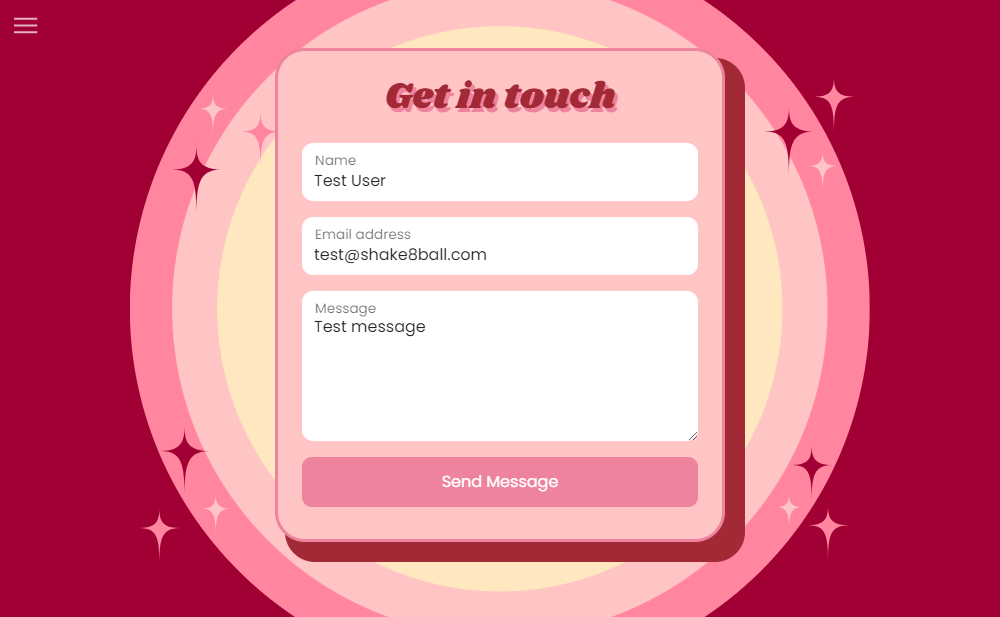
Now that the fields were created, I added a submit button at the bottom of the form using the existing CSS used in the buttons in the navigation menu to keep consistency with the button styles.
Adding the form validation
Now that we have the form ready to accept a user's message and contact details, now we need to accept and send the data.
The first thing for each field is to check if the fields are blank or null, and if they are, to alert that there is an error and that the field needs to be filled, preventing the form to be submitted.
Next, for specific validation, if the email address field is filled, to check if against email regex to confirm if it is a valid email address - and again, if not, display an error and prevent the form from being submitted.
I achieved this by creating and setting the variable 'error' to false at the beginning of the check. If any of the above checks were triggered, the 'error' variable would be set to true.
Finally, at the very end of all the checks for each field, I checked if the 'error' variable was true or false, and if true, would prevent the form from submitting by preventing the default action of the submit button.
    $(':input').removeClass('is-invalid');
    var error = false;
    if ($('#txtName').val() == '' || $('#txtName').val() == null) {
        error = true;
        $('#txtName').addClass('is-invalid');
    }
    if ($('#txtEmail').val() == '' || $('#txtEmail').val() == null) {
        error = true;
        $('#errorTxtEmail').text('Please enter your email.');
        $('#txtEmail').addClass('is-invalid');
    } else if ($('#txtEmail').val() != '' && $('#txtEmail').val() != null) {
        var regex = /^[\w-\.]+@([\w-]+\.)+[\w-]{2,4}$/g;
        var data = $('#txtEmail').val();
        var runner = regex.test(data);
        if (!runner) {
            error = true;
            $('#errorTxtEmail').text('Please enter a valid email.');
            $('#txtEmail').addClass('is-invalid');
        }
    }
    if ($('#txtareaComment').val() == '' || $('#txtareaComment').val() == null) {
        error = true;
        $('#txtareaComment').addClass('is-invalid');
    }
    if (error) {
        e.preventDefault();
        return
        }
Adding the PHP
Now that the validation and form fields are ready, the next thing is to create the server side PHP file, receive the sent data and send back a response.
I originally wanted to construct my own JSON to POST to the server - which I was able to create a working version locally using a local server via XAMPP.
However after deploying the site I ran into some issues regarding the PHP file not accepting the POST request.
After some troubleshooting and attempting fixes that included the CORS policy, Cross origin, Allowing options in the head and more, I ended up finding that PHP specifically would only allow form data only with valid name properties for each form field.
I changed the structure of the POST to send the form field data by putting an action property in line on the form tag that would POST the form data on the submission of the form. After deploying this, I was able to retrieve the data from the PHP server file and send a response back to the client.
Send email including form data received
Now that the form data is being received via the PHP file, the next thing to do is to send the message from the user via email to an inbox that can be checked.
From the POST request, I created 3 variables that could store the form data that was received.
    $Name = $_POST['txtName'];
    $Email = $_POST['txtEmail'];
    $Message = $_POST['txtareaComment'];
PHP has an inbuilt mail function that can be used to send emails, so I used this to send an email. But in order to do this, I first had to construct the email message that would be sent.
I created an email template inside the PHP file that would include a subject showing where the email had come from (the Shake 8 Ball contact form), along with the user's name, email and message that they had inputted into the contact form.
Once this was completed, I then initiated the inbuilt mail function and sent an email to myself so I could see what messages were coming in from the form, as shown below.
    $mailTo = "<email address to send to>";
    $headers = "Shake 8 Ball Contact Form | From:".$Email;
    $txt = "Message from ".$Name." (via the Shake8Ball contact form).\n\nEmail: ".$Email."\n\n".$Message;
    mail($mailTo, $headers, $txt);
This would then display the below in my inbox:

Show successfully sent message in client
Now that the email is successfully being sent, being received in the inbox and containing the form data that was submitted, the next step is to let the user know that their message has been successfully sent.
In order to do this, there are a few ways that it can be achieved, the easiest being to display a browser alert that the message has been sent.
However, with this method, the first issue was that the form data, or at least the contact form would still be visible, giving the user potentially uncertainty with whether or not the message was sent as their text was still in the fields - creating a disjointed user flow. I also felt that it would not look as aesthetic as the rest of the site as it would have the default browser styling and buttons in the alert.
A much better way of communicating this to the user I felt was a dedicated page that would advise the user that their message had been sent, with the option to then go back to the home page. This way, I could style the page to have the same look as the rest of the site which would be a lot more aesthetic. More importantly though, the user would have a clean user flow as they would no longer see the contact form, and would have a button to continue their journey through the site. Also, if errors presented themselves on the contact page, I would be able to display them on the contact form page, and only after the successful message sending would it then redirect them to the success page.
Creating the success page
For the success page, I wanted to keep in line with the existing style and colours for the site.
Earlier when creating the contact form, I created some CSS classes that could be reused for any similar pages that would need similar styling. I was able to reuse these classes for the success page, as below, including both the styling applied to the form container and the wrapper for the form container.
    .bgFormWrapper {
        width: 100vw;
        position: absolute;
        display: flex;
        justify-content: center;
        z-index: 2;
        }
        .bgForm {
        min-width: 280px;
        width: 60vw;
        max-width: 450px;
        border-radius: 30px;
        height: max-content;
        border: 3px solid #ED839D;
        background-color: #FFC4C4;
        box-shadow: 20px 20px #A22A36,
                    10px 20px #A22A36,
                    20px 10px #A22A36;
        font-family: 'Poppins', sans-serif;
        }
Instead of fields like in the contact form, I create a title and some descriptive text that would let the user know that their message has been sent. Additionally, to allow for a smooth user flow, I added a button below the text, again reusing the previous button styling to maintain consistency, that would allow the user to be redirected to the home page once they reach and finished reading the success message.
This resulted in the below success message.